My First Home Lab: 2023 HP z440 Edition
Comprehensive documentation of building a 7-host homelab using HP Z440 workstations with vSAN ESA and 10 GbE networking.
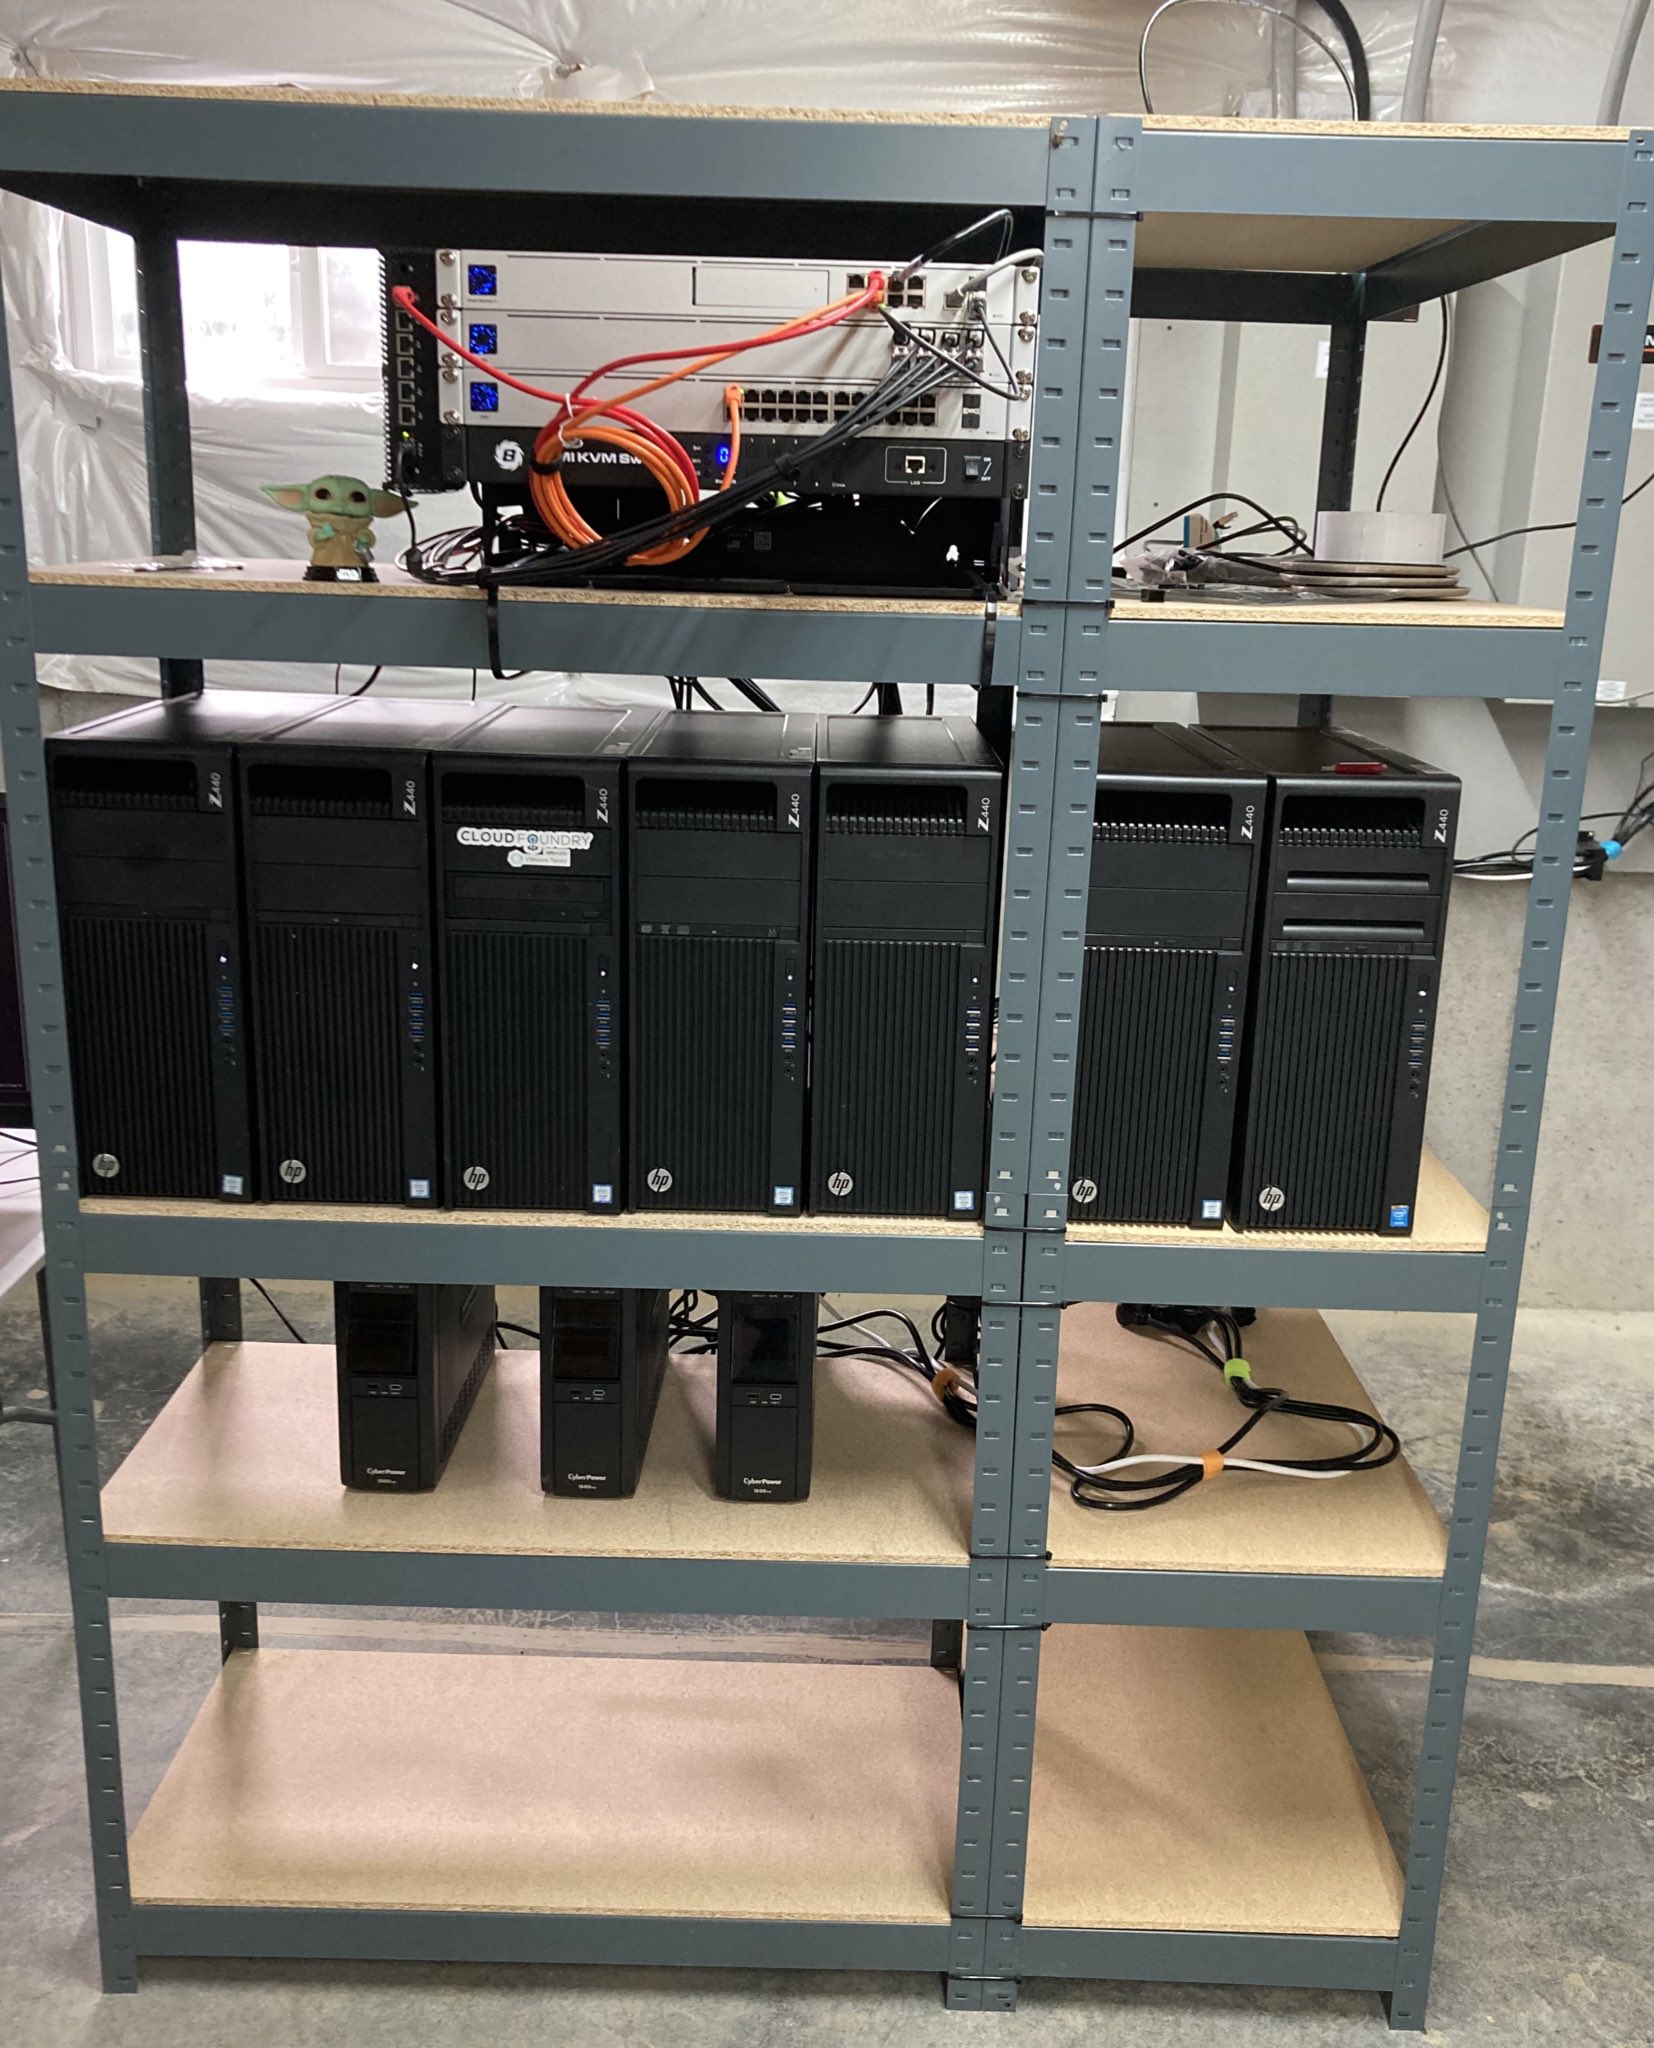
Here is the mostly finished product:
How it all started…
I have wanted to build a homelab for quite some time, but it has been something I have never really made the time to do. For most of my career, I could work with tons of enterprise-grade equipment directly, and for all intents and purposes, I had my own dedicated lab in my company's datacenter. So overall, I didn't really need to build my own.
Fast forward to 2023, and I have been working for VMware for approximately a year and a half. Sure, I have access to many excellent dedicated labs, on-demand physical labs, and various nested labs through vCloud Director, but it's not the same as managing my own gear… Sometimes I just want to hug a server 😂
The Host Build
Earlier that year, I started exploring affordable host options and landed on the HP Z440. I chose it because the desktop chassis supports up to 256 GB of RAM. My original plan was to run one Z440; by the time I wrote this, the homelab had seven.
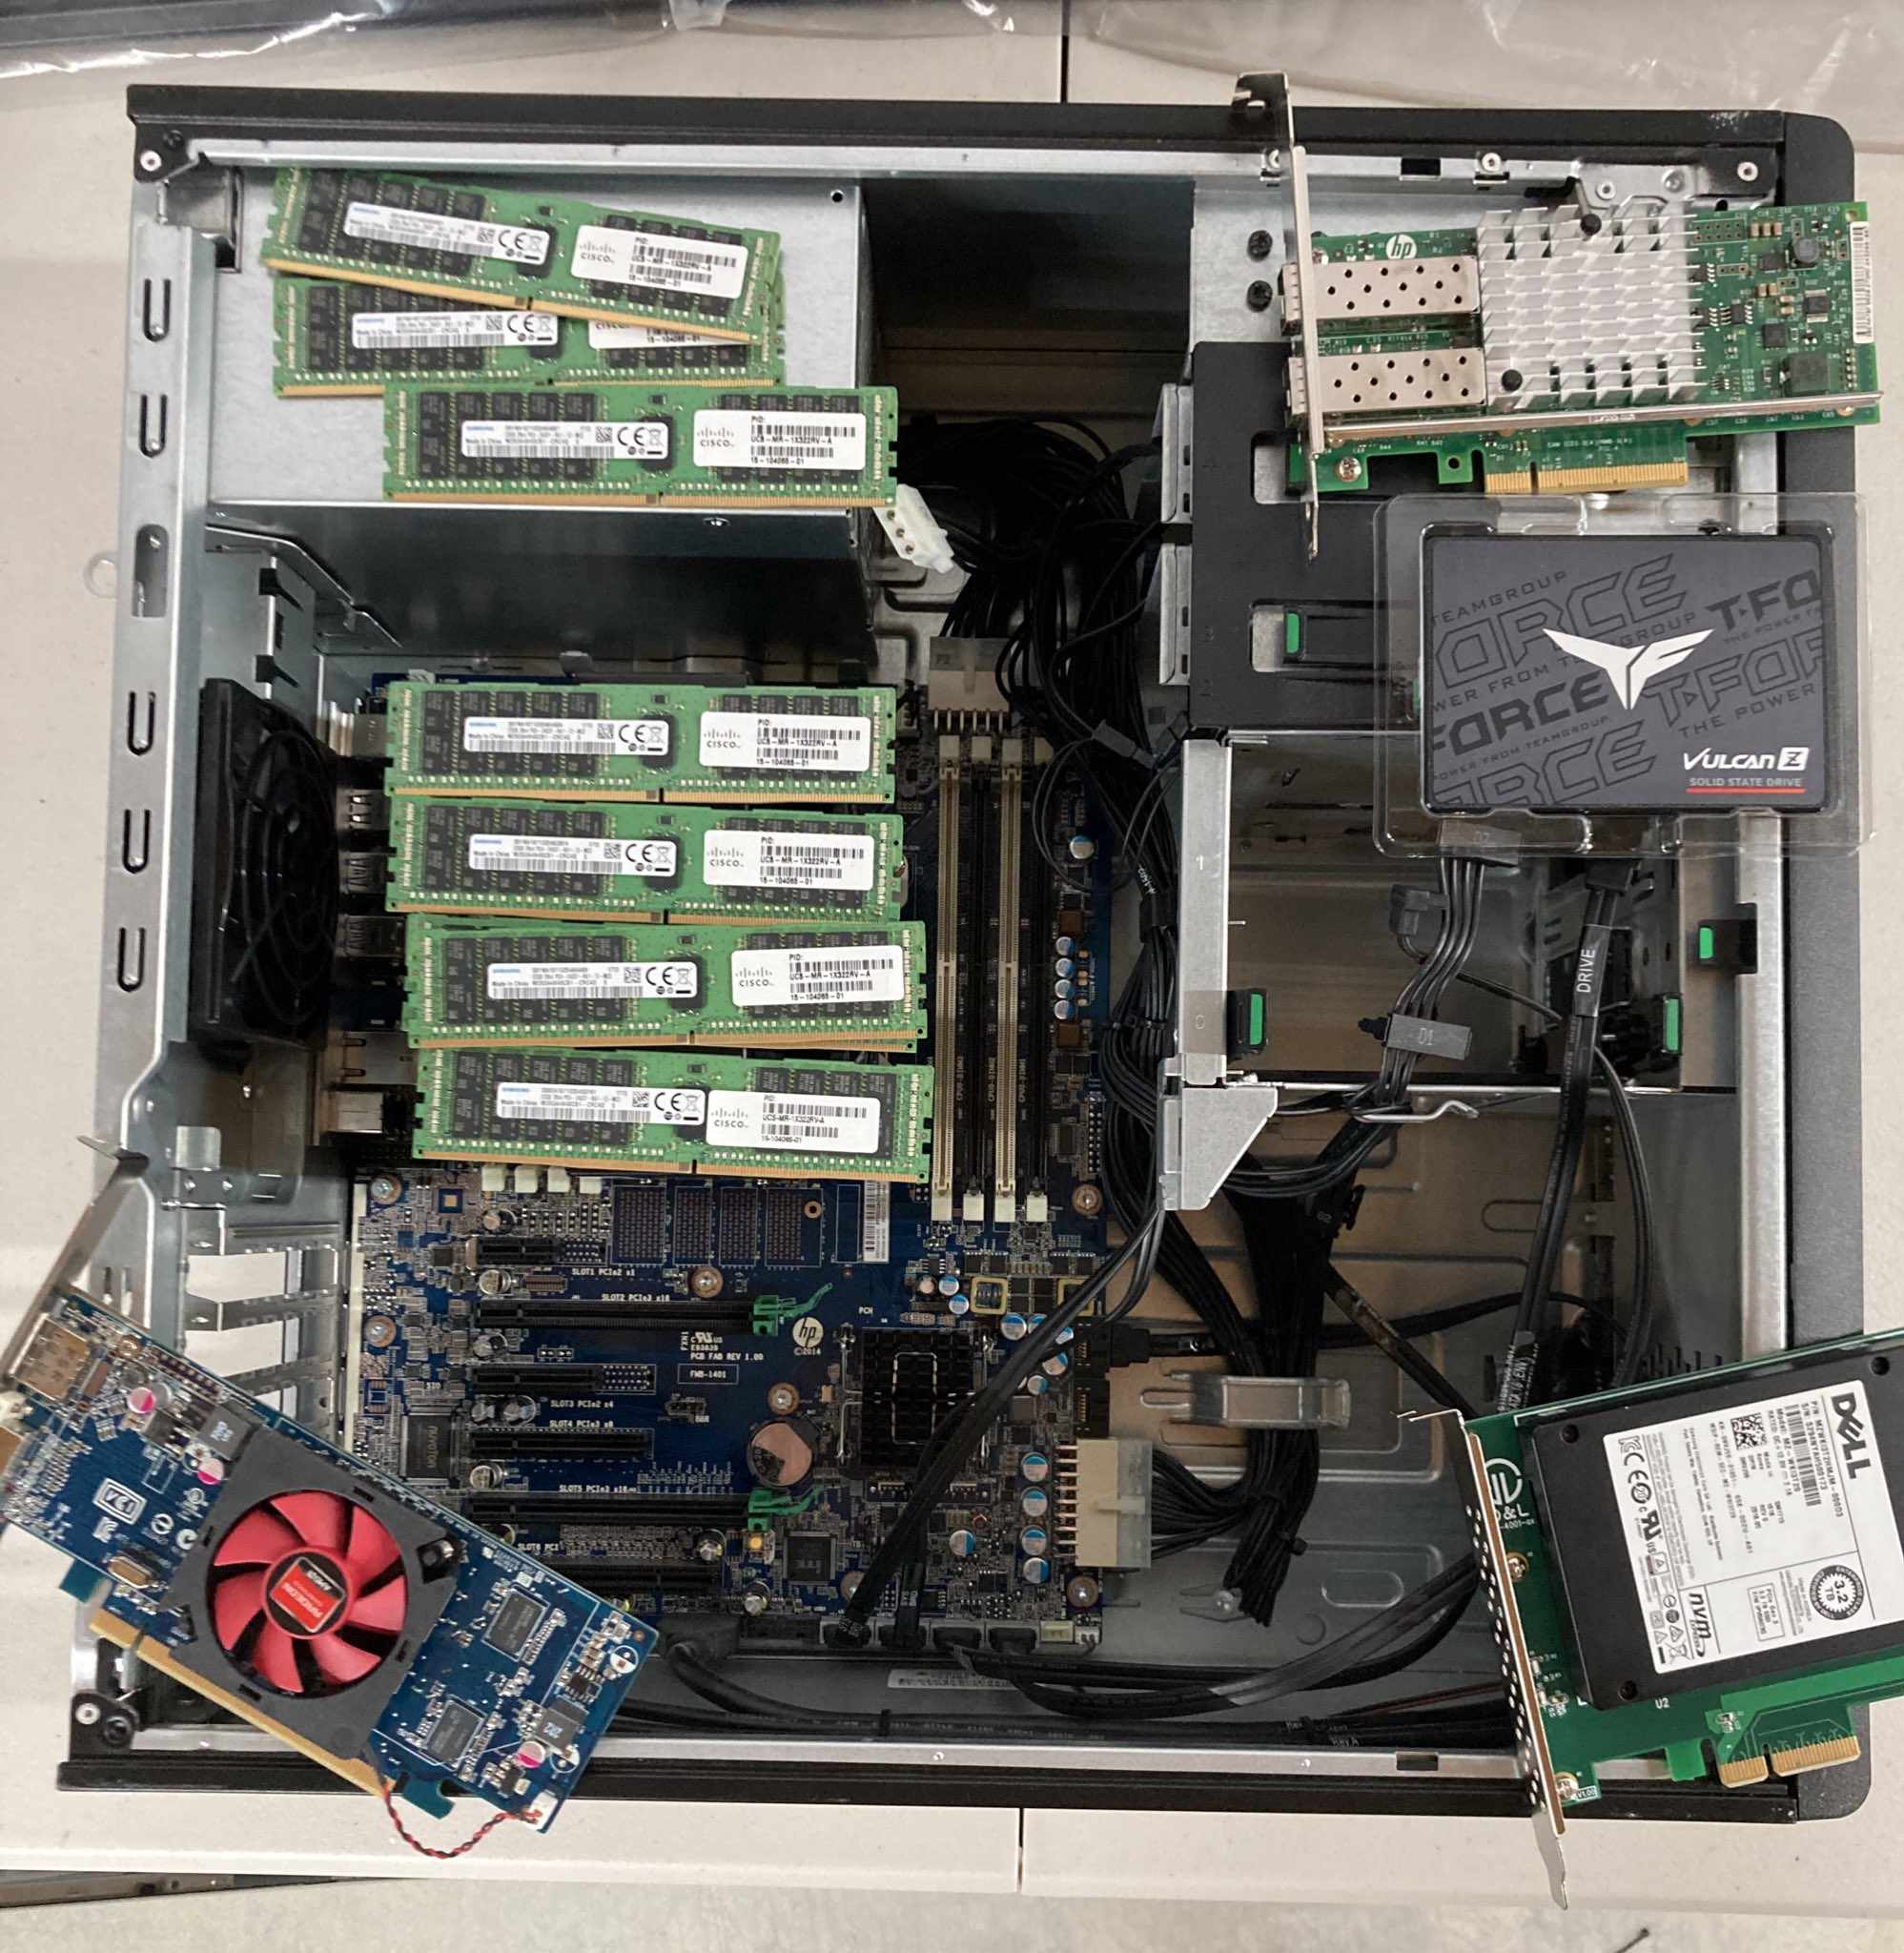
HP z440 BOM:
- HP Z440 base (700 W PSU, 14c/28t Intel Xeon E5-2690 v4, usually with the memory fan)
- 256 GB (8 x 32 GB DDR4 PC4-2400T) — aim for less than $30 per DIMM
- HP NC560 dual-port 10 GbE SFP+ NIC
- 3.2 TB NVMe Dell Branded: Samsung SM1715 U.2 form factor – vSAN ESA
- U.2 to PCIe Adapter
- 240 GB T-Force Vulcan Z SATA drive — ESXi boot
- Radeon HD7470 1 GB graphics card — inexpensive display output
Total Approx Host Cost: $700-800ish – depending on the deals you can get on memory/eBay offers, etc.
Parts depicted below:
Fully assembled HP z440 build:
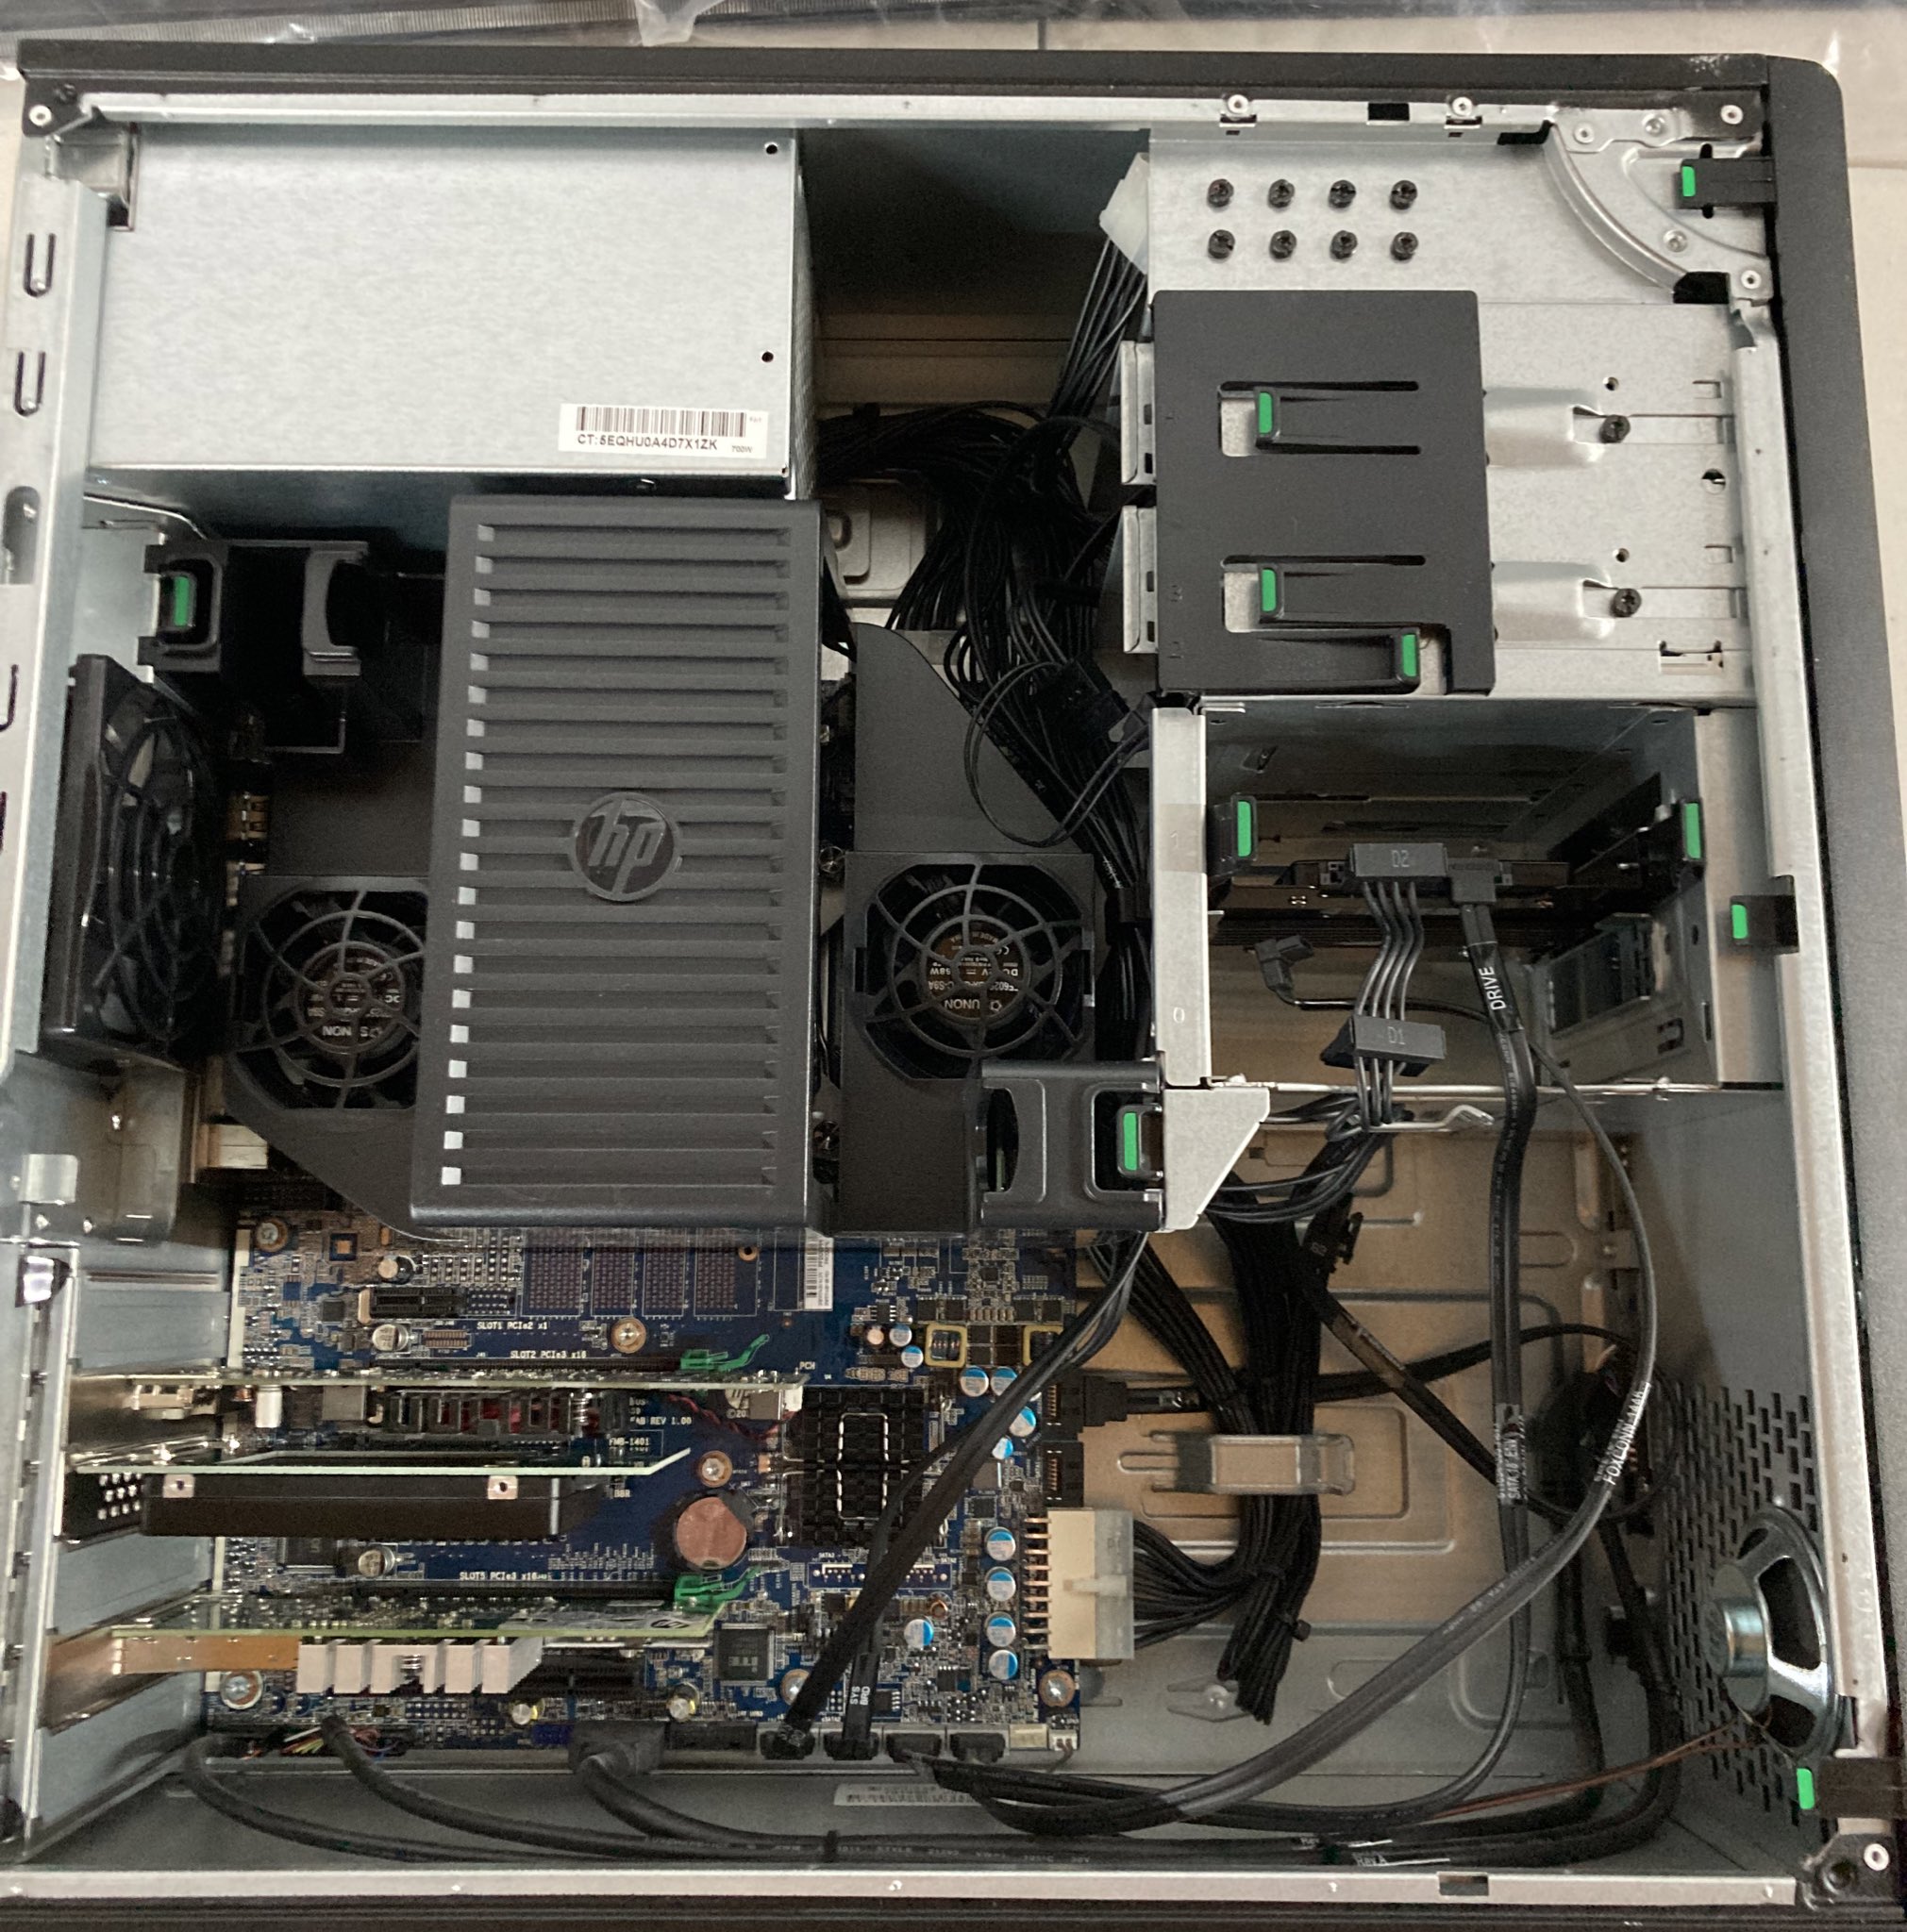
Some critical observations on the HP z440:
- If possible, get a unit with the memory fan included. Large memory configurations pause during boot when the fan is missing. You can override the warning, but that becomes tedious during cluster operations. Replacement fans usually cost $40-$60 on eBay, which is significant relative to the host price.
- It does not come with integrated graphics support. So you will need to install a cheap graphics card. It is worth noting that it does have an OG PCI port, so if you want to find an old PCI VGA card, you can keep all of the PCI-Express slots open for important cards, etc.
- These units ship with either a 700 W or 525 W PSU. The 700 W model leaves more headroom for add-in cards.
- The gaming community picked up these units as a potential cheap gaming PC build – so there are many different listings on eBay with various configurations – figure out the details of what unit you are going after.
- Fully populating unit with 256 GB of ram will run you 200 to 300 USD, depending on how good of a deal you can get. If you don't need that much, going with 16 GB DIMMs and maxing out at 128 GB is a bit cheaper.
- The HP z440 is built like an absolute tank – It has been quite some time since I have handled a case that is so sturdy – truly a pleasure to work with.
Networking:
From a networking perspective, I decided to keep it simple and continue to stay within the Ubiquiti ecosystem. I had wanted to upgrade my overall network gear for quite some time, and the homelab buildout seemed like a perfect time to pull the trigger.
Networking BOM:
- UDM-PRO
- USW-Aggregation
- TES Smart 8 Port KVM switch
- USW-24 – not in use, will move for my network drops elsewhere
The USW-Aggregation switch stood out: at $269, eight ports of 10 GbE SFP+ connectivity were a strong value. I considered 10 GbE copper, but the switches and adapters cost more. The USW-Aggregation, UniFi DAC cables, HP dual-port NIC, and default ESXi 8.0 installation all worked together out of the box.
The UniFi gear was simple to set up. Creating VLANs and configuring jumbo frames were both straightforward.
Here's a view of the network stack before the 7th host was added.
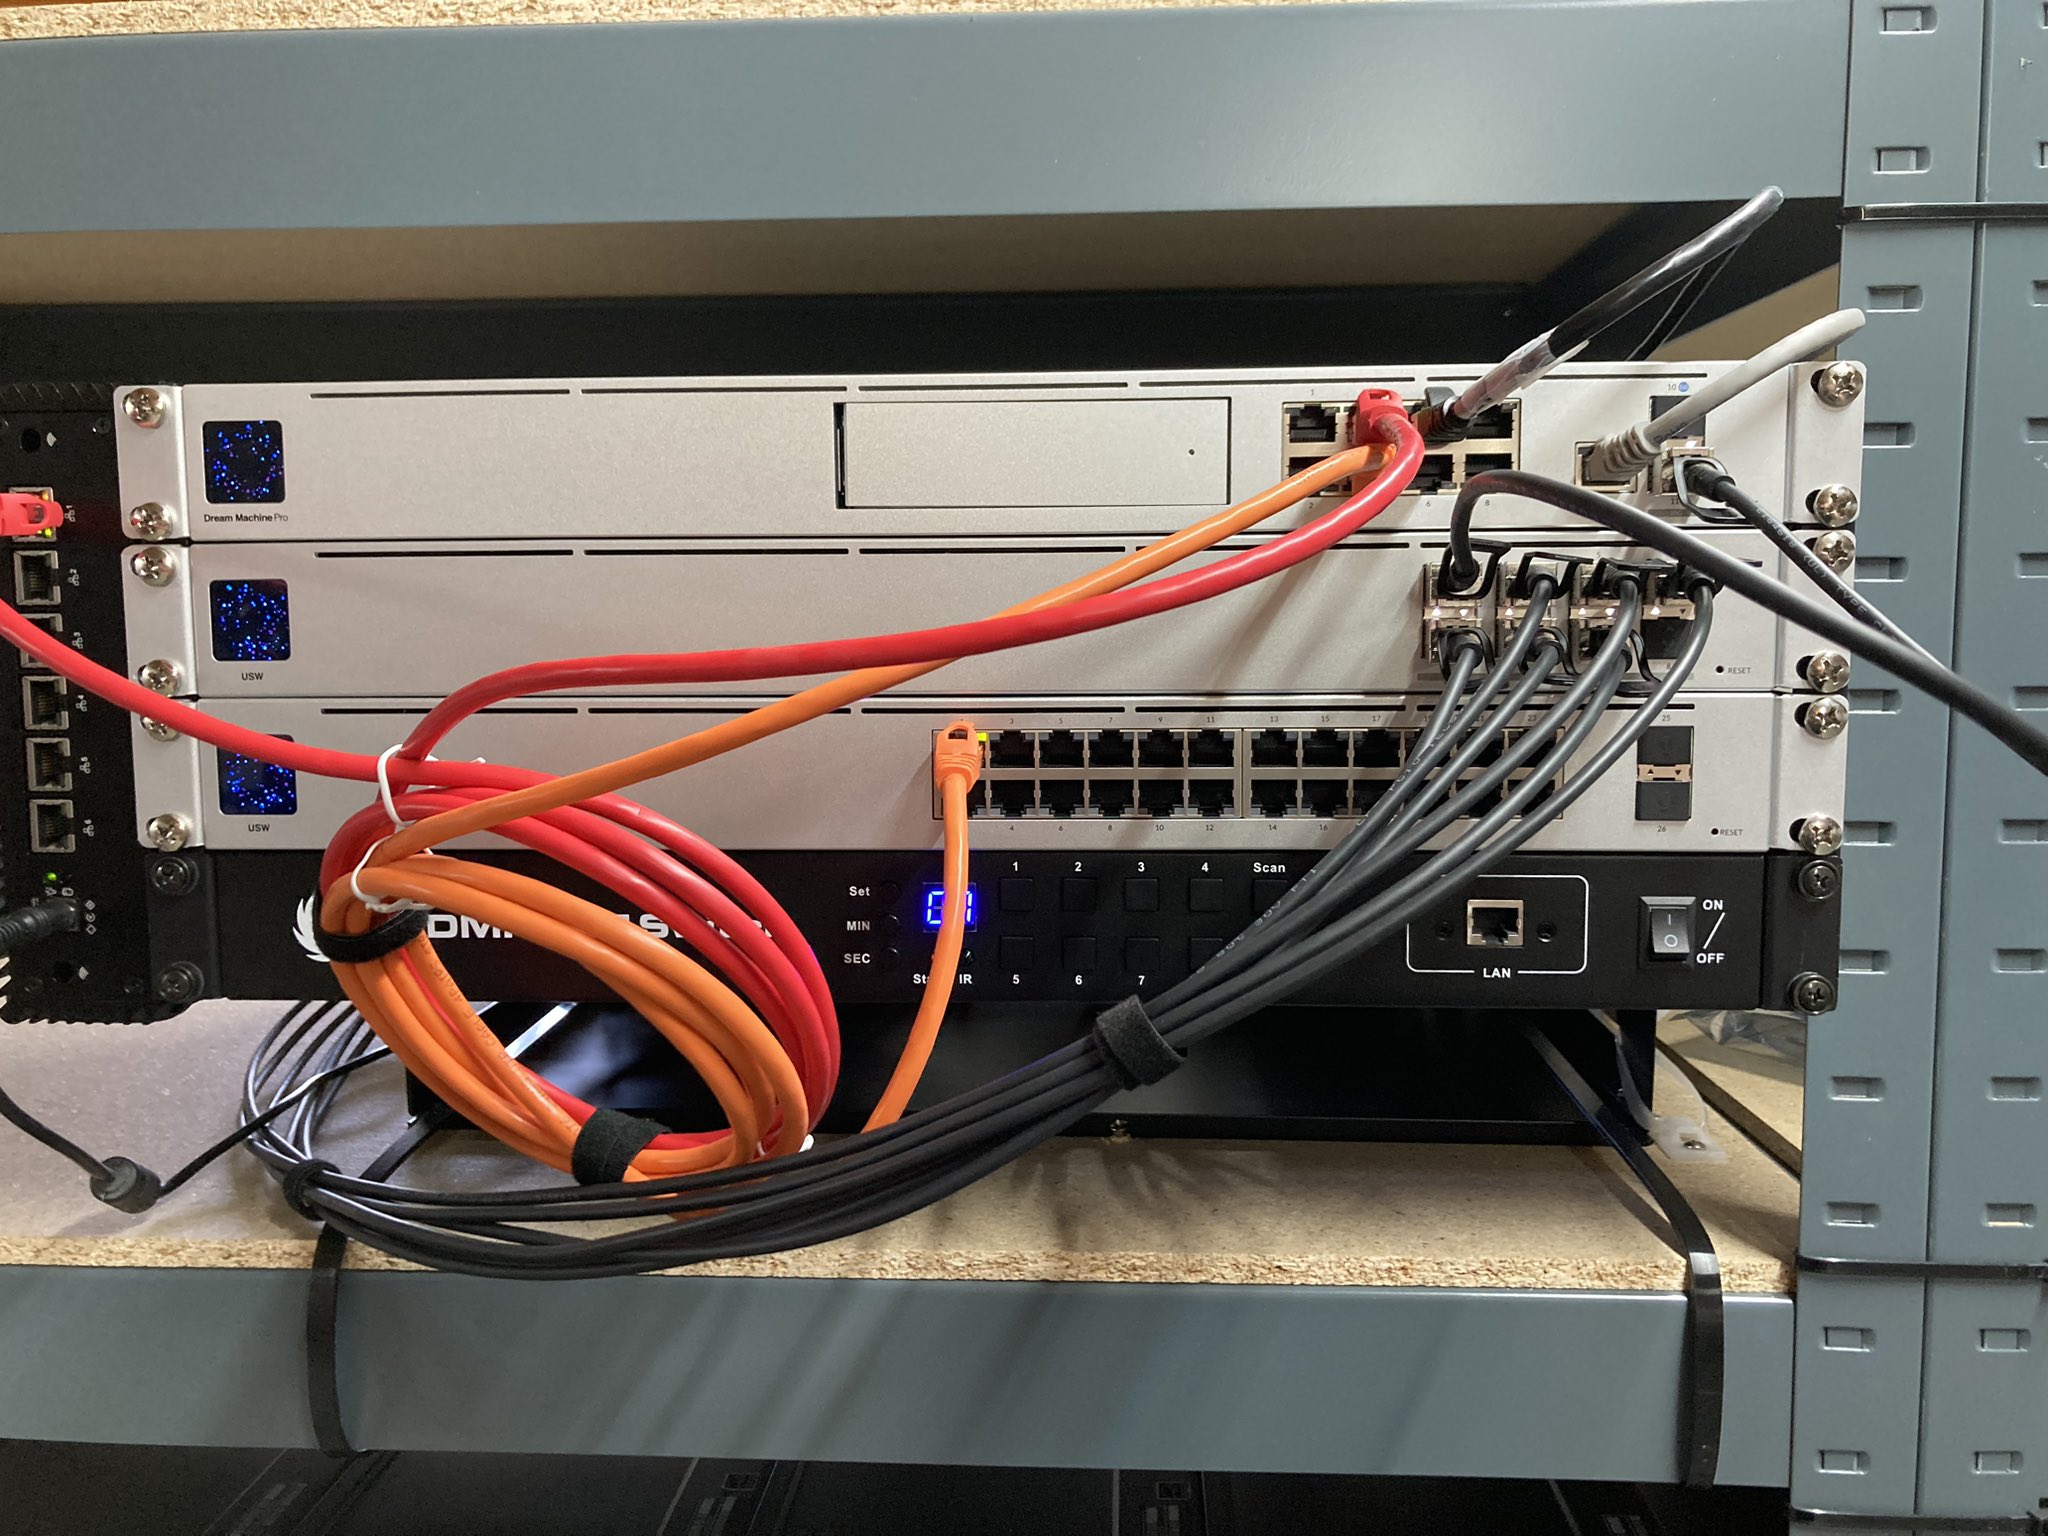
See some of the cable management (before the 7th host as well):
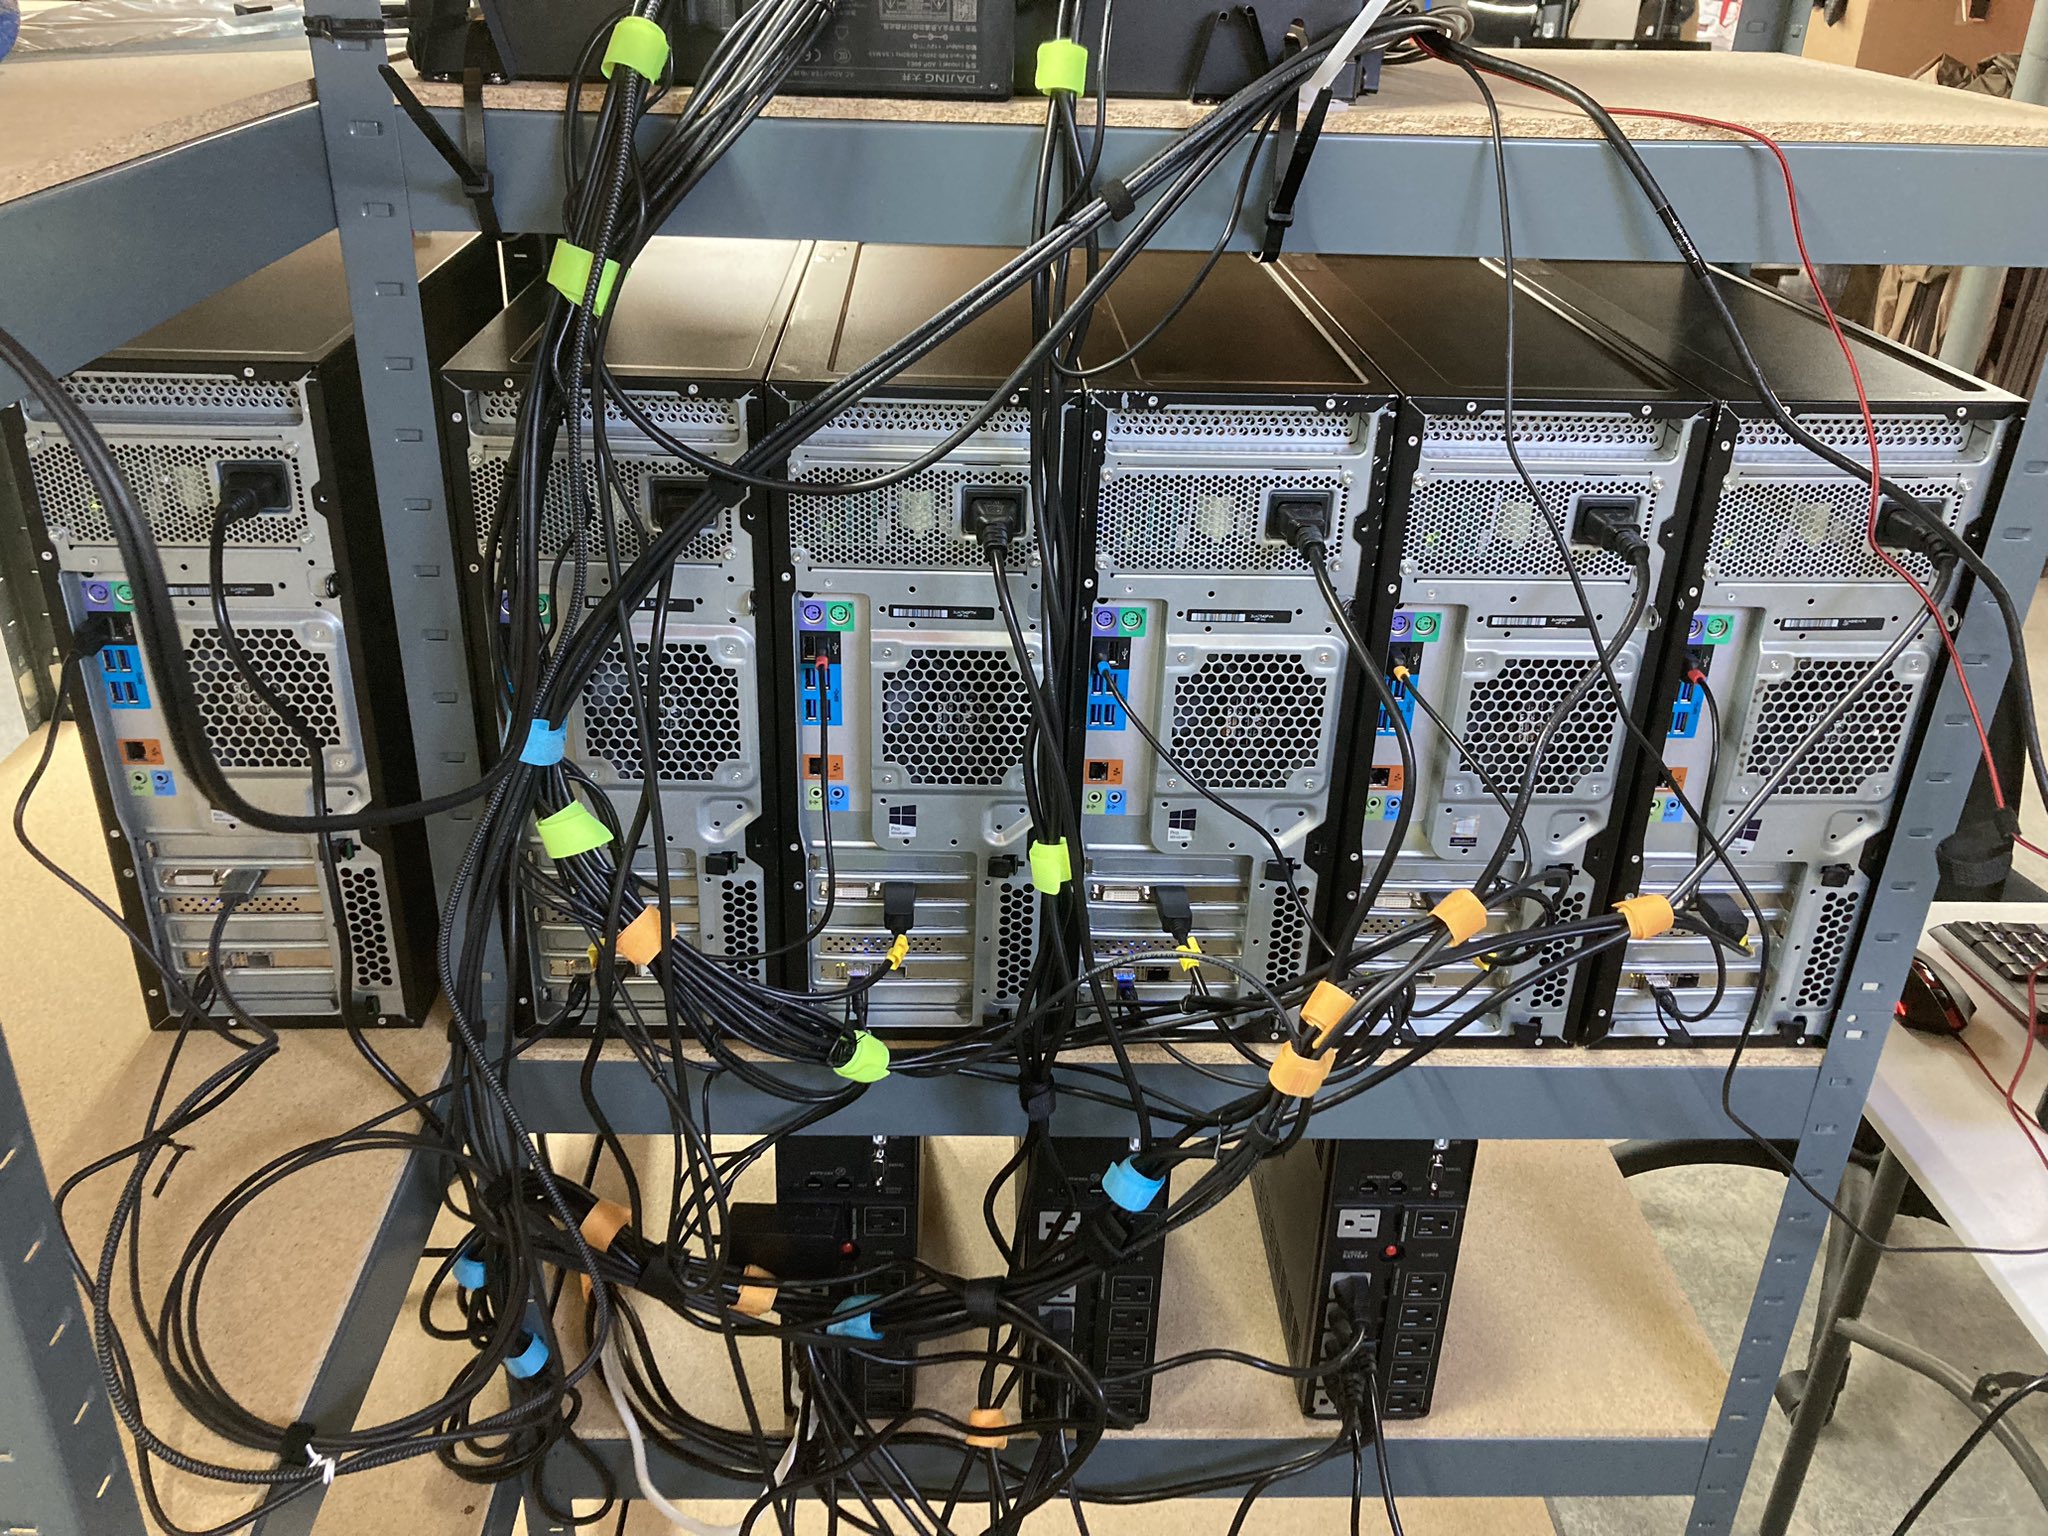
I am also running two pfSense boxes – a physical install (strapped to the side of the network stack) and a VM to serve as both DNS resolvers and NTP services for my gear.
Hypervisor: VMware, of course
Now that I covered the base, let's dive into some of the details of the hypervisor setup.
- I initially used the ESXi 8.0 default build with these hosts and had no issues
- I was able to upgrade to 8.0.1 without issues as well.
- I manually bypassed the CPU warning since the Xeon 2690v4 is not on the official CPU-supported list.
- All the gear listed in BOM above worked without additional drivers or VIBs using the vanilla ESXi installer.
Disclaimer: This stack is not certified, or supported by VMware. I am using gear that is not certified and not supported. Don't run this stack in a real environment. This is simply for my homelab purposes.
A view from vCenter:
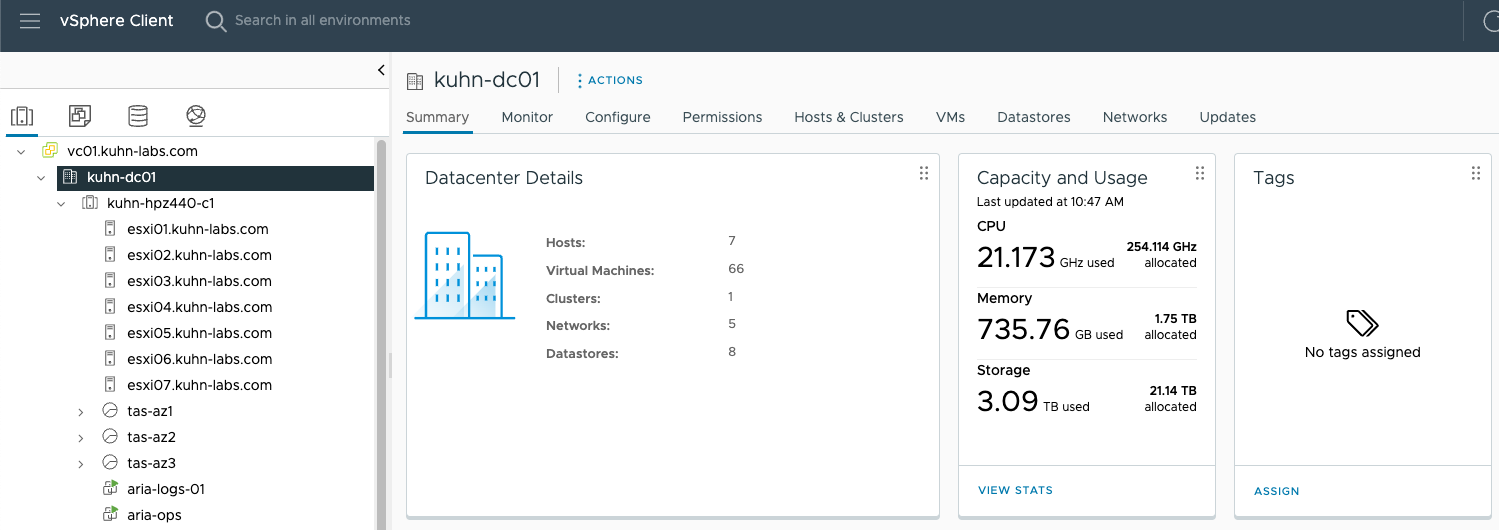
Total Resource Stats:
- CPU: 98 physical cores, 196 threads, ~ 254 GHz
- Memory: 1.75 TB of RAM
- Storage: ~22 TB of NVMe storage for vSAN ESA
vSAN ESA:
I was lucky enough to take advantage of the new vSAN ESA architecture – this saved me a considerable amount of money as I didn't have to worry about purchasing cache drives in addition to my storage drives. It also simplifies the overall stack.
Quick performance view of the cluster –
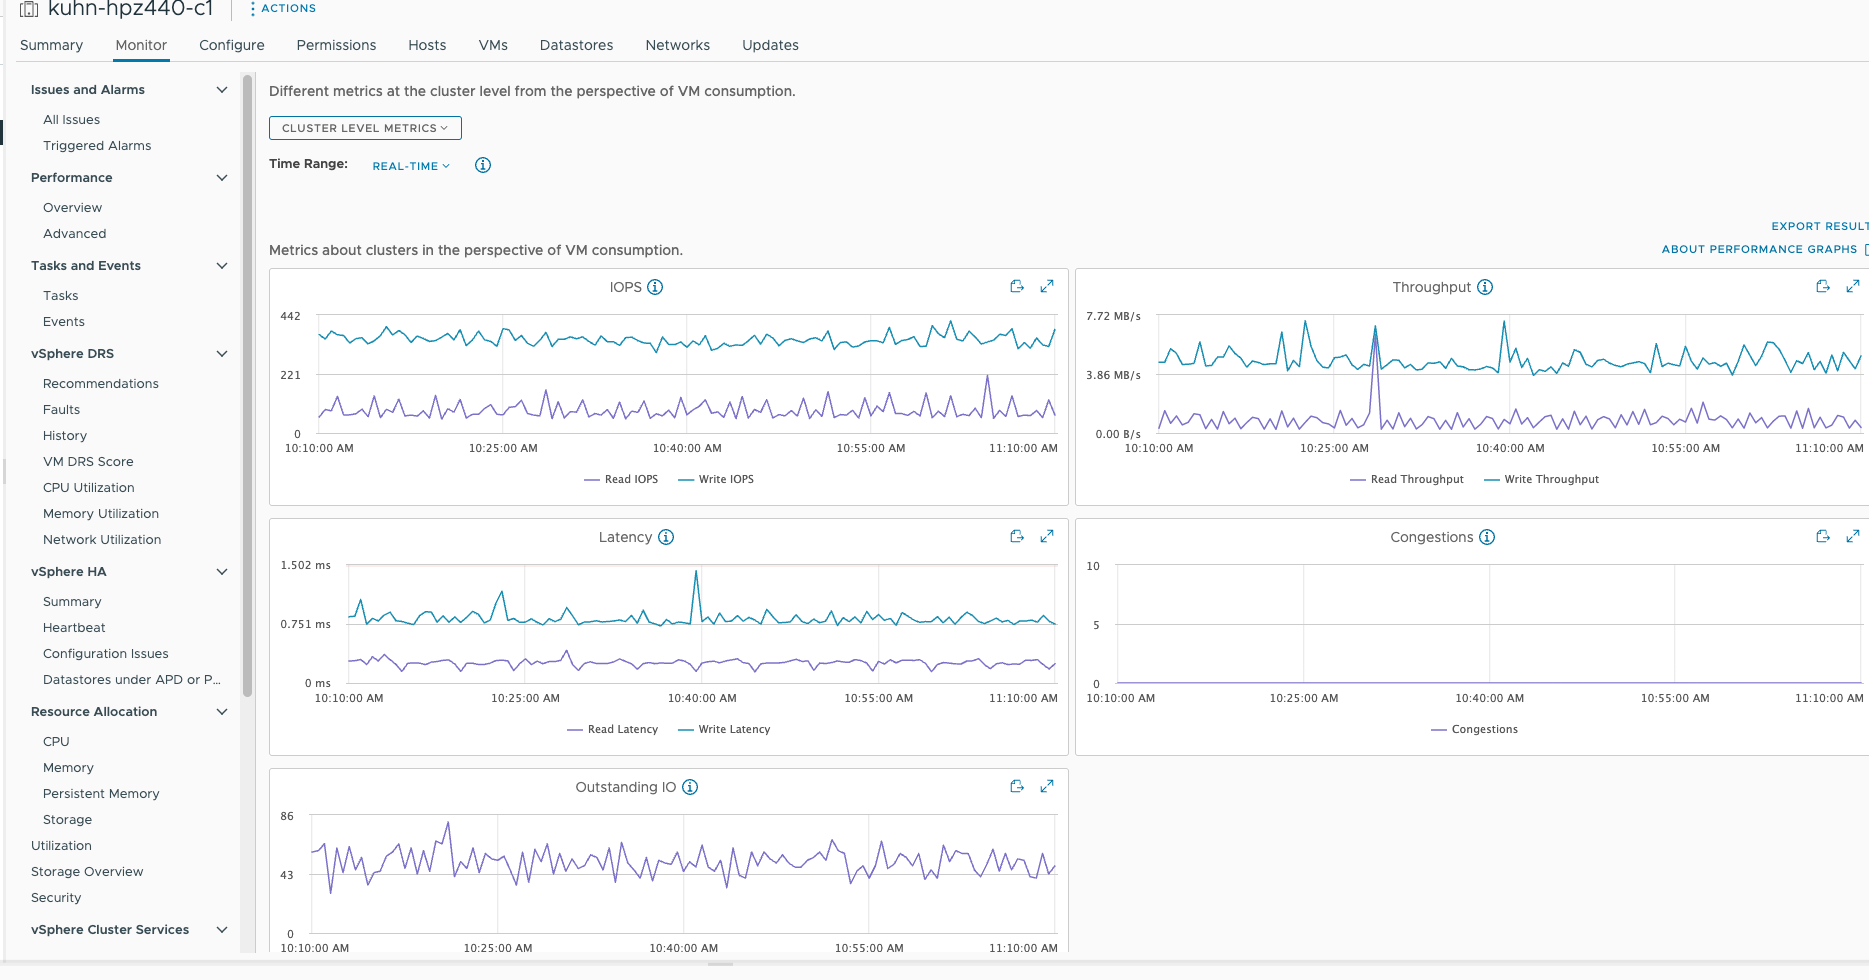
I still need to stress-test it; I suspect the 10 GbE network will be the bottleneck.
If you made it this far, thanks for reading. I have thoroughly enjoyed this build and look forward to the projects this hardware will support.
👀 Keep your eyes peeled for my future home lab content 👀
Check out the power consumption of this blog here: HP z440 HomeLab: Power Consumption Update