Block Storage on Tanzu Platform: A Big Unlock for Developers
A platform-engineer's recipe for enabling block storage on Tanzu Platform 10.4 with the Elastic Application Runtime tile — unlocking stateful workloads that need persistent disk and were previously hard to land on the platform.
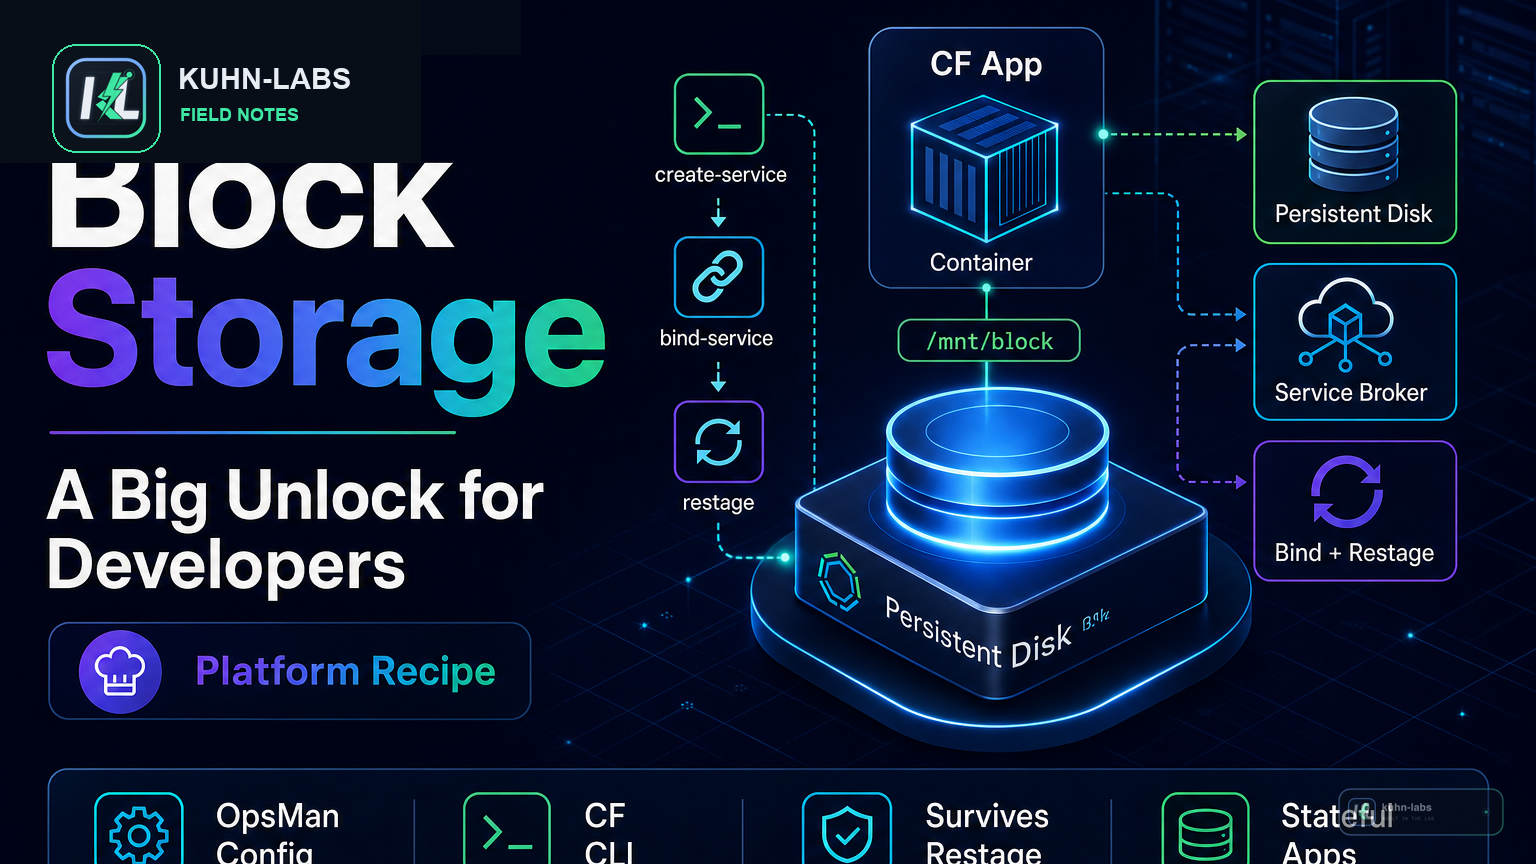
Persistent block storage is one of the biggest unlocks of Tanzu Platform 10.4. It makes a new class of workloads practical on Tanzu Platform: one-instance apps, sharded state, write-ahead logs, hot caches, checkpoint-style workloads, file-conversion scratch directories, and other patterns that need durable local storage mounted into the app container.
In Tanzu Platform 10.4, the capability ships built into the Elastic Application Runtime (EAR) tile as the Block Storage Broker. Once the operator enables it, developers get a clear workflow: cf create-service, cf bind-service, cf restage. The result is a real block device mounted in the container, with data that survives restages and restarts.
What the broker actually is
The Block Storage Broker is a service broker that lives inside the Elastic Application Runtime tile. It accepts cf create-service calls, talks to vSphere CNS to provision a First-Class Disk, and arranges for Diego to bind-mount it into your app's container at startup.
From the developer's side it looks identical to any other CF service: create, bind, restage, read your env. Under the hood it's spinning up real cloud disks and attaching them to cell VMs.
Step 1 — Configure the broker in OpsMan
In Tanzu Operations Manager, open the Elastic Application Runtime tile and click App Containers in the left-hand nav. Scroll to the Block storage volume service section and fill in four fields:
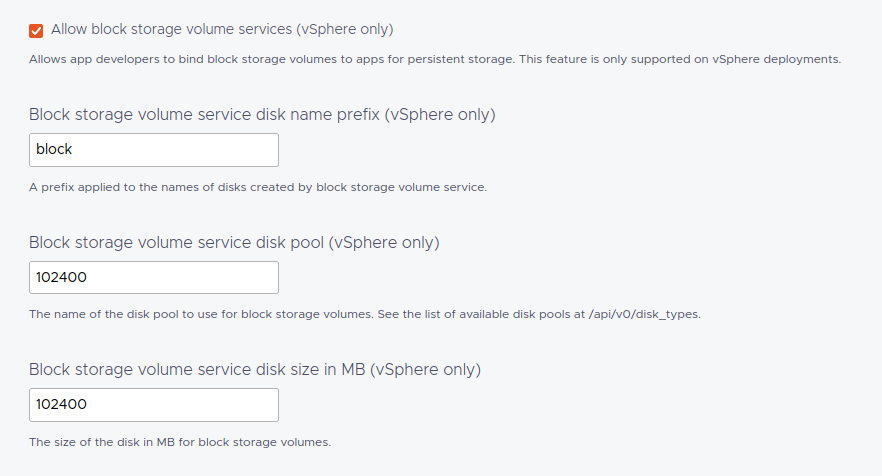
- Allow block storage volume services (vSphere only) — check this. It's the master switch that wires the broker into Cloud Controller and instructs Diego to mount block volumes into bound containers.
- Block storage volume service disk name prefix (vSphere only) — the string used to name the First-Class Disks created in vSphere on the platform's behalf.
blockis a sensible default; pick something that makes the volumes easy to spot in vCenter for your foundation (for examplecdc-block). - Block storage volume service disk pool (vSphere only) — the BOSH disk-pool identifier the broker provisions from. The docs call this the IaaS shape of the disk, not the size; the default is the first pool in the list unless you've defined custom pools.
- Block storage volume service disk size in MB (vSphere only) — the default volume size in MB. The documented default is
1024MB. On my foundation, the exposed developer plan is10240(10 GB), which is a practical proof-point size for validating the flow before you decide what plans your app teams actually need.
Click Save, then switch to the Errands pane in the left nav and confirm the Block Storage Broker Errand is set to On. This is the post-deploy errand that registers the broker with Cloud Controller every time you apply changes — leaving it on keeps the broker registration sticky across tile upgrades.
Save again, return to the Installation Dashboard, review pending changes, and click Apply Changes. When Apply Changes finishes, the broker is deployed and registered with Cloud Controller.
Step 2 — Enable service access
The errand registers the broker, but per CF semantics service plans are private by default — meaning developers can't see block-storage in their marketplace until an admin explicitly enables access. One Tanzu cf CLI command from any admin-targeted shell does it:
cf enable-service-access block-storageThat makes the service plan visible to every org on the foundation. To scope it to specific orgs instead, pass -o <org-name> — useful when you want to pilot block storage with one team before opening it up platform-wide.
Verify with:
cf service-access | grep -iE "block|blockstoragebroker"You should see the plan listed with access: all (or your specific org name):
broker: blockstoragebroker
   service         plan                access
   block-storage   on-demand-10240     all
Step 3 — Verify the marketplace
Switch to any developer-style CF target (any user with access to an org you enabled) and check the marketplace:
cf marketplace -e block-storageYou'll see the on-demand plan with the default size you configured in Step 1:
broker: blockstoragebroker
plans:
   name              description                 free or paid
   on-demand-10240   Block storage volumes       free
The plan name encodes the configured default size in MB (10240 = 10 GB in this example). If you changed the disk-size field in Step 1, the plan name reflects your choice.
Step 4 — Use it (developer)
Before you hand this to an app team, set the expectation clearly: block storage is single-attach by design. It is a great fit for one-instance apps, sharded state, write-ahead logs, hot caches, and checkpoint-style workloads. It is not shared NFS; for multi-instance shared writes, use a managed database or shared filesystem instead.
cf create-service block-storage on-demand-10240 my-disk
cf bind-service my-app my-disk
cf restage my-app
One thing to know about that last command: restage, not restart. Diego attaches the volume during the staging cycle, so a fresh cf restage is what picks up the new mount.
Step 5 — What your app sees
Inside the container, your app reads VCAP_SERVICES and finds:
{
  "block-storage": [{
    "name": "my-disk",
    "instance_name": "my-disk",
    "label": "block-storage",
    "plan": "on-demand-10240",
    "tags": ["block-storage"],
    "credentials": {},
    "volume_mounts": [{
      "container_dir": "/var/vcap/data/<binding-guid>",
      "device_type": "dedicated",
      "mode": "rw"
    }]
  }]
}
The container_dir is your mount point. Read and write it like a local filesystem — the data persists across restages and restarts.
In a fresh proof run, the broker and Cloud Controller pieces behaved exactly this way: the app was bound to a block-storage service instance, the service plan was on-demand-10240, and cf env showed a dedicated read-write mount under /var/vcap/data/<service-guid>. After a restart, the app came back on a different container and the write counter kept incrementing on the same mounted path.
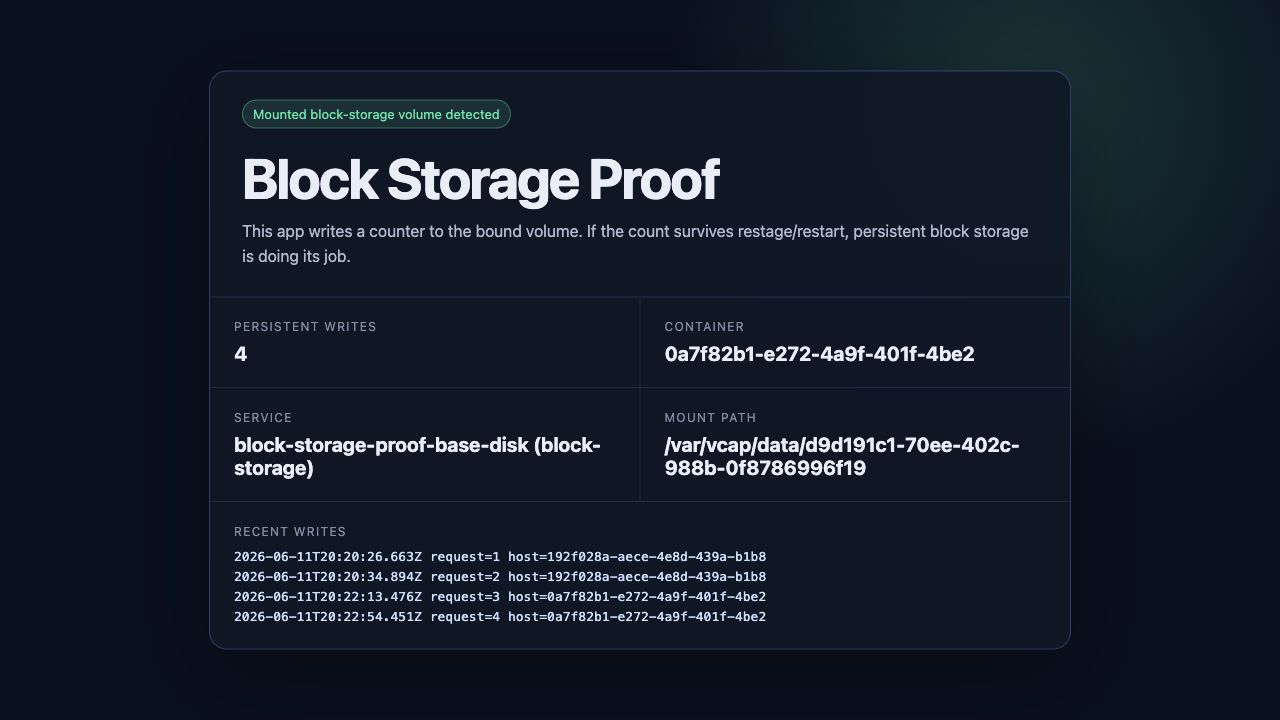
A quick Python sanity check, deployable as a Flask app:
import os, json, time
import flask

VCAP = json.loads(os.environ["VCAP_SERVICES"])
MOUNT = VCAP["block-storage"][0]["volume_mounts"][0]["container_dir"]

app = flask.Flask(__name__)

@app.route("/")
def index():
    log = os.path.join(MOUNT, "boots.log")
    with open(log, "a") as f:
        f.write(f"{time.time()}\n")
    with open(log) as f:
        return f"This container has booted {len(f.readlines())} times.\n"
cf push it, hit the route a few times, then cf restage and watch the counter keep climbing from the mounted volume.
Operator tips worth knowing
A few rollout details are worth calling out:
- Restage to mount the volume. Diego attaches the disk when an app's container is being created, so after
cf bind-serviceruncf restageto bring up new instances with the mount in place. - Validate with a tiny app before broad rollout. Push a single-instance app, create and bind a disk, restage, write a counter file under the reported
container_dir, then restart the app and confirm the counter keeps climbing from the same mounted path. - Org quotas. Block storage instances count against your org's
total_service_instancesquota. Raise that limit proactively when you roll out broadly:cf update-org-quota <quota> --total-service-instances 50. - Disk pool and size choices. The disk pool field in Step 1 maps to a vSphere CNS disk-pool resource defined in BOSH and controls the IaaS shape of the disk. The configured size in MB drives both the plan name (
on-demand-<size>) and the provisioned volume size, so set it to the most common size you expect to hand out. - Plan backup and recovery separately. Block storage gives the app a persistent device; it is not a backup. Coordinate volume protection and recovery with your vSphere and storage teams.
Where block storage shines
Block storage is the right fit when your app has local-disk semantics — one-instance apps, sharded state, write-ahead logs, hot caches, checkpoint-style workloads, file-conversion staging, or anything else that wants a real filesystem mounted in the container.
For multi-instance shared state, reach for a managed database (Postgres, MySQL on Tanzu) or a shared filesystem (NFS broker). For long-term archival, object storage is the better fit. Tanzu Platform ships brokers for all of those alongside block storage — pick the one that matches the access pattern.
TL;DR
One OpsMan section, an errand toggle, one cf enable-service-access, and three developer commands — that's the whole pipeline to give your platform stateful-workload support.
# Operator (one-time)
# 1. OpsMan: Elastic Application Runtime tile → App Containers → Block storage volume service
#    - Enable the checkbox
#    - Set disk-name prefix, disk pool, default size
# 2. OpsMan: Errands → Block Storage Broker Errand → On
# 3. Apply Changes
# 4. cf enable-service-access block-storage

# Developer
cf create-service block-storage on-demand-10240 my-disk
cf bind-service my-app my-disk
cf restage my-app